命令的使用可以單獨一個命令,也可以後面跟引數使用。加引數使用,往往功能更加強悍。由於引數眾多,所以本文件只介紹常用命令的簡單使用,引數的使用規則可以用前面我們說的幫助類命令檢視。
注:
一些命令有可能不能使用,因為沒有安裝此命令的包,所以,書寫正確的命令但報錯時,請檢查是否安裝命令相關包。
檢查date命令屬於哪個軟體包:
[root@freeit ~]#
yum provides date
已載入外掛:langpacks, product-id, subscription-manager
This system is not registered to Red Hat Subscription Management。 You can use subscription-manager to register。
coreutils-8.22-11.el7.x86_64
: A set of basic GNU tools commonly used in
: shell scripts
源 :@anaconda/7。x
匹配來源:
檔名 :/usr/bin/date
1.系統類命令
2。1。1。data 顯示日期命令
例:檢視當前時間
[root@freeit ~]# date
2015年 04月 28日 星期二 12:34:54 CST
2。1。2。cal 列出當前月份的日曆
[root@freeit ~]# cal
April 2015
Su Mo Tu We Th Fr Sa
1 2 3 4
5 6 7 8 9 10 11
12 13 14 15 16 17 18
19 20 21 22 23 24 25
26 27 28 29 30
引數:
-1:顯示當前一個月的日曆
-3:顯示前一個月、本月、下一個月日曆
-s:週日作為第一天顯示
-m:週一作為第一天顯示
-j:輸出的日期為一年的第幾天
-y:顯示本年度全年日曆
-V:顯示當前日曆版本
2。1。3。bc 簡單的計算器
[root@freeit ~]# bc
bc 1。06。95
Copyright 1991-1994, 1997, 1998, 2000, 2004, 2006 Free Software Foundation, Inc。
This is free software with ABSOLUTELY NO WARRANTY。
For details type `warranty‘。
10*10
100
//計算10x10的結果
^C
(interrupt) Exiting bc。
//按ctrl+c退出計算器。
2。1。4。ctrl+c 中斷當前程式
如上個實驗:退出計算器
2。1。5。wc 列出檔案位元組數
此命令可列出檔案行數、單詞數、位元組數
例:檢視/etc/passwd檔案的內容
[root@freeit ~]# wc /etc/passwd
41 70 1990 /etc/passwd
//一共41行,70個單次,1990個位元組
-c——檢視總的位元組數
-w—檢視總的單詞數
-l ——檢視總的行數
2。1。6。hostname 檢視和修改主機名
檢視主機名
[root@freeit ~]# hostname
freeit。example。com
修改主機名
在之前學習的RHEL5。x&6。x系統中,主機名儲存檔案為/etc/sysconfig/network,修改主機名可以修改此檔案,但是要重啟系統或者不重啟,同時用hostname命令修改當前主機名即可。但是在RHEL7。x的系統中,主機名的配置檔案為/etc/hostname。修改主機名的方法也多種多樣。如下
hostname命令修改
——————————————————————————-先檢視此時的主機名——————————————————
[root@freeit ~]# hostname
freeit。example。com
——————————————————————————修改並檢視————————————————————-
[root@freeit ~]# hostname gyh。example。com
[root@freeit ~]# hostname
gyh。example。com
修改配置檔案
RHEL7。x之前的系統,修改配置檔案之後,用hostname檢視,主機名不變。要重啟才能生效,而7。x的系統,修改配置檔案之後,同時用hostname檢視,主機名與配置檔案實現了同步,這也更加說明了Linux與windows對比的強勢,基本上不用重啟
————————————————-檢視此時主機名配置檔案內容及此時的主機名————————————[root@freeit ~]# cat /etc/hostname
freeit。example。com
[root@freeit ~]# hostname
freeit。example。com
————————————————————-修改配置檔案並檢視此時的主機名——————————————-
[root@freeit ~]# cat /etc/hostname
gyh。example。com
[root@freeit ~]# hostname
gyh.example.com
nmtui-hostname
把主機名修改回freeit開頭
使用此命令後彈出如下對話方塊

直接填寫並選擇 【OK】退出
檢視主機名
[root@freeit ~]# hostname
freeit。example。com
[root@freeit ~]# cat /etc/hostname
freeit。example。com
如上,不僅修改了主機名,同時也修改了配置檔案
hostnamectl
把主機名改回gyh開頭
[root@freeit ~]# hostnamectl set-hostname gyh。example。com
[root@freeit ~]# hostname
gyh。example。com
[root@freeit ~]# cat /etc/hostname
gyh。example。com
同樣:不僅修改了主機名,同時也修改了配置檔案
2。1。7。uname 檢視系統資訊(版本&核心)
例:
[root@freeit ~]# uname
Linux
引數說明:
[root@freeit ~]# uname ——help
-a, ——all 顯示系統所有資訊
-s, ——kernel-name 顯示系統核心名
-n, ——nodename 顯示網路節點主機名(即顯示主機名)
-v, ——kernel-version 顯示核心版本
-m, ——machine 檢視硬體
-i, ——hardware-platform 檢視硬體平臺
2。1。8。time 量測特定指令執行時所需消耗的時間及系統資源等資訊
例:
[root@freeit ~]# time
real 0m0。000s
user 0m0。000s
sys 0m0。000s
2。1。9。clear 清屏
說明:此命令可以清除當前螢幕的所有內容,只需輸入clear回車即可。不做過多說明。
注:ctrl+l快捷鍵也能起到清屏的作用,更加快捷,方便。
2。1。10。whoami 檢視當前使用者
例:
[root@freeit~]# whoami
root
//當前使用者為root
2。1。11。檢視當前已登入的使用者
[root@freeit ~]# w
09:55:21 up 1:44, 3 users, load average: 0。00, 0。00, 0。00
USER TTY FROM LOGIN@ IDLE JCPU PCPU WHAT
root pts/0 192。168。10。1 08:13 1。00s 0。60s 0。13s w
root pts/1 192。168。10。1 08:45 4:26 0。24s 0。24s -bash
root tty1 - 08:53 48:48 6。79s 0。31s -bash
[root@freeit ~]# who
root pts/0 2015-04-24 08:13 (192。168。10。1)
root pts/1 2015-04-24 08:45 (192。168。10。1)
root tty1 2015-04-24 08:53
2。1。12。halt&reboot 關機重啟
Halt為關機命令,reboot為重啟。不做過多說明,請自行實驗
2。1。13。列出所有語系
[root@freeit ~]# locale -a
aa_DJ
aa_DJ。iso88591
aa_DJ。utf8
aa_ER
aa_ER@saaho
aa_ER。utf8
aa_ER。utf8@saaho
aa_ET
aa_ET。utf8
……
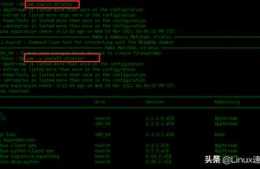
2。1。14。修改語言
——————————————————————————修改之前————————————————————————-
[root@freeit ~]# rm ——help
用法:rm [選項]。。。 檔案。。。
Remove (unlink) the FILE(s)。
-f, ——force ignore nonexistent files and arguments, never prompt
-i prompt before every removal
-I prompt once before removing more than three files, or
when removing recursively; less intrusive than -i,
while still giving protection against most mistakes
——interactive[=WHEN] prompt according to WHEN: never, once (-I), or
always (-i); without WHEN, prompt always
——one-file-system 遞迴刪除一個層級時,跳過所有不符合命令列參
數的檔案系統上的檔案
——no-preserve-root do not treat ’/‘ specially
——preserve-root do not remove ’/‘ (default)
-r, -R, ——recursive remove directories and their contents recursively
-d, ——dir remove empty directories
-v, ——verbose explain what is being done
——help 顯示此幫助資訊並退出
——version 顯示版本資訊並退出
預設時,rm 不會刪除目錄。使用——recursive(-r 或-R)選項可刪除每個給定
的目錄,以及其下所有的內容。
To remove a file whose name starts with a ’-‘, for example ’-foo‘,
use one of these commands:
rm —— -foo
rm 。/-foo
請注意,如果使用rm 來刪除檔案,通常仍可以將該檔案恢復原狀。如果想保證
該檔案的內容無法還原,請考慮使用shred。
GNU coreutils online help:
請向
要獲取完整文件,請執行:info coreutils ’rm invocation‘
————————————————————————-修改之後——————————————————————————-
[root@freeit ~]#
LANG=en
[root@freeit ~]# rm ——help
Usage: rm [OPTION]。。。 FILE。。。
Remove (unlink) the FILE(s)。
-f, ——force ignore nonexistent files and arguments, never prompt
-i prompt before every removal
-I prompt once before removing more than three files, or
when removing recursively; less intrusive than -i,
while still giving protection against most mistakes
——interactive[=WHEN] prompt according to WHEN: never, once (-I), or
always (-i); without WHEN, prompt always
——one-file-system when removing a hierarchy recursively, skip any
directory that is on a file system different from
that of the corresponding command line argument
——no-preserve-root do not treat ’/‘ specially
——preserve-root do not remove ’/‘ (default)
-r, -R, ——recursive remove directories and their contents recursively
-d, ——dir remove empty directories
-v, ——verbose explain what is being done
——help display this help and exit
——version output version information and exit
By default, rm does not remove directories。 Use the ——recursive (-r or -R)
option to remove each listed directory, too, along with all of its contents。
To remove a file whose name starts with a ’-‘, for example ’-foo‘,
use one of these commands:
rm —— -foo
rm 。/-foo
Note that if you use rm to remove a file, it might be possible to recover
some of its contents, given sufficient expertise and/or time。 For greater
assurance that the contents are truly unrecoverable, consider using shred。
GNU coreutils online help:
Report rm translation bugs to
For complete documentation, run: info coreutils ’rm invocation‘
2。1。15。CPU檢視
例1:檢視CPU資訊
[root@freeit ~]# more /proc/cpuinfo
processor : 0
vendor_id : GenuineIntel
cpu family : 6
model : 60
model name : Intel(R) Core(TM) i5-4210M CPU @ 2。60GHz
stepping : 3
microcode : 0x17
cpu MHz : 2594。080
cache size : 3072 KB
……
例2:CPU執行位數
[root@freeit ~]# getconf LONG_BIT
64
例3:檢視CPU型號和邏輯核心數
[root@freeit ~]# cat /proc/cpuinfo |grep name |cut -f2 -d: |uniq -c
2 Intel(R) Core(TM) i5-4210M CPU @ 2。60GHz
例4:檢視物理CPU個數
[root@freeit ~]# cat /proc/cpuinfo |grep physical |uniq -c
1 physical id : 0
1 address sizes : 40 bits physical, 48 bits virtual
例5:驗證是否支援64位,結果大於0支援64位
[root@freeit ~]# cat /proc/cpuinfo |grep flags |grep ’lm‘ |wc -l
1
例6:檢視CPU是否支援虛擬化
[root@freeit ~]# cat /proc/cpuinfo |grep flags
flags : fpu vme de pse tsc msr
pae
mce cx8 apic sep mtrr pge mca cmov pat pse36 clflush dts mmx fxsr sse sse2 ss syscall nx pdpe1gb rdtscp lm constant_tsc arch_perfmon pebs bts nopl xtopology tsc_reliable nonstop_tsc aperfmperf eagerfpu pni pclmulqdq ssse3 fma cx16 pcid sse4_1 sse4_2 x2apic movbe popcnt aes xsave avx f16c rdrand hypervisor lahf_lm ida arat epb xsaveopt pln pts dtherm fsgsbase smep
注:pae支援半虛擬化。Intel VT支援全虛擬化。
例7:檢視記憶體資訊
[root@freeit ~]# more /proc/meminfo
MemTotal: 1010788 kB
MemFree: 729532 kB
MemAvailable: 737372 kB
Buffers: 1080 kB
Cached: 114456 kB
SwapCached: 0 kB
Active: 88088 kB
Inactive: 86136 Kb
……
例8:檢視全面硬體資訊
[root@freeit ~]# dmidecode |less
# dmidecode 2。12
SMBIOS 2。4 present。
364 structures occupying 16582 bytes。
Table at 0x000E0010。
Handle 0x0000, DMI type 0, 24 bytes
BIOS Information
Vendor: Phoenix Technologies LTD
Version: 6。00
Release Date: 07/31/2013
Address: 0xEA050
Runtime Size: 90032 bytes
ROM Size: 64 kB
Characteristics:
……
例9:檢視伺服器型號
[root@freeit ~]# dmidecode |grep “Product Name”
Product Name: VMware Virtual Platform
Product Name: 440BX Desktop Reference Platform
例10:檢視軟硬raid資訊
————————————————————————-檢視軟raid資訊——————————————————————
[root@freeit ~]# cat /proc/mdstat
Personalities :
unused devices:
——————————————————————————檢視硬raid資訊——————————————————————
[root@freeit ~]# cat /proc/scsi/scsi
Attached devices:
Host: scsi4 Channel: 00 Id: 00 Lun: 00
Vendor: VMware, Model: VMware Virtual S Rev: 1。0
Type: Direct-Access ANSI SCSI revision: 02
Host: scsi4 Channel: 00 Id: 01 Lun: 00
Vendor: VMware, Model: VMware Virtual S Rev: 1。0
Type: Direct-Access ANSI SCSI revision: 02
Host: scsi4 Channel: 00 Id: 02 Lun: 00
Vendor: VMware, Model: VMware Virtual S Rev: 1。0
Type: Direct-Access ANSI SCSI revision: 02
Host: scsi4 Channel: 00 Id: 03 Lun: 00
Vendor: VMware, Model: VMware Virtual S Rev: 1。0
Type: Direct-Access ANSI SCSI revision: 02
Host: scsi4 Channel: 00 Id: 04 Lun: 00
Vendor: VMware, Model: VMware Virtual S Rev: 1。0
Type: Direct-Access ANSI SCSI revision: 02
Host: scsi3 Channel: 00 Id: 00 Lun: 00
Vendor: NECVMWar Model: VMware SATA CD01 Rev: 1。00
Type: CD-ROM ANSI SCSI revision: 05
例11:檢視硬體資訊
[root@freeit ~]# lspci
00:00。0 Host bridge: Intel Corporation 440BX/ZX/DX - 82443BX/ZX/DX Host bridge (rev 01)
00:01。0 PCI bridge: Intel Corporation 440BX/ZX/DX - 82443BX/ZX/DX AGP bridge (rev 01)
00:07。x ISA bridge: Intel Corporation 82371AB/EB/MB PIIX4 ISA (rev 08)
00:07。1 IDE interface: Intel Corporation 82371AB/EB/MB PIIX4 IDE (rev 01)
00:07。3 Bridge: Intel Corporation 82371AB/EB/MB PIIX4 ACPI (rev 08)
00:07。7 System peripheral: VMware Virtual Machine Communication Interface (rev 10)
00:0f。0 VGA compatible controller: VMware SVGA II Adapter
00:10。0 SCSI storage controller: LSI Logic / Symbios Logic 53c1030 PCI-X Fusion-MPT Dual Ultra320 SCSI (rev 01)
……………………
例12:檢視開機資訊
[root@freeit ~]# dmesg |less
[ 0。000000] Initializing cgroup subsys cpuset
[ 0。000000] Initializing cgroup subsys cpu
[ 0。000000] Initializing cgroup subsys cpuacct
[ 0。000000] Linux version 3。10。0-121。el7。x86_64 (mockbuild@x86-021。build。eng。bos。redhat。com) (gcc version 4。8。2 20140120 (Red Hat 4。8。2-16) (GCC) ) #1 SMP Tue Apr 8 10:48:19 EDT 2014
[ 0。000000] Command line: BOOT_IMAGE=/vmlinuz-3。10。0-121。el7。x86_64 root=UUID=49bd8af3-32fb-446a-9104-b562640e5129 ro rd。lvm。lv=rhel/root crashkernel=auto rd。lvm。lv=rhel/swap vconsole。font=latarcyrheb-sun16 vconsole。keymap=us net。ifnames=0 biosdevname=0 rhgb quiet
……
2.目錄操作命令
2。2。1。ls 列出目錄下的內容及屬性資訊
[root@freeit ~]# ls /root
1 Documents install。log。syslog Public
anaconda-ks。cfg Downloads Music Templates
Desktop install。log Pictures Videos
2。2。2。pwd 列出使用者當前所處目錄路徑
[root@freeit www]# pwd
/var/www
2。2。3。du 列出目錄或檔案佔用磁碟空間的大小
——————————————————檢視/var/www這個目錄佔用的空間大小——————————-
[root@freeit www]# du
16 。/error/include
212 。/error
4 。/cgi-bin
4 。/html
260 。/icons/small
944 。/icons
1168 。
<預設單位為K>
————————————————————引數說明——————————————————
-h:以可讀方式顯示(帶單位顯示)
[root@freeit www]# du -h
16K 。/error/include
212K 。/error
4。0K 。/cgi-bin
4。0K 。/html
260K 。/icons/small
944K 。/icons
1.2M
。
-s:只顯示總大小
[root@freeit www]# du -sh
1。2M 。
2。2。4。cd 改變使用者的當前目錄
——————————————————從/var/www回到/root目錄————————————
[root@freeit www]# pwd
/var/www
[root@freeit www]# cd /root
[root@freeit ~]# pwd
/root
注:
不帶引數是回到自己的家目
cd – 回到上個目錄
2。2。5。mkdir 建立一個新目錄及多級目錄
————————————————————在root下建立一個gyh目錄——————————————————
[root@freeit ~]# mkdir /root/gyh
[root@freeit ~]# ls /root
1 Documents install。log Pictures Videos
anaconda-ks。cfg Downloads install。log。syslog Public
Desktop
gyh
Music Templates
注:如果建立的父級目錄不存在,可以使用遞迴建立引數:-p
[root@freeit ~]# mkdir /root/gyh/aaa
mkdir: cannot create directory ‘/root/gyh/aaa’: No such file or directory
[root@freeit ~]# mkdir -p /root/gyh/aaa
[root@freeit ~]# ls
1 anaconda-ks。cfg gyh ……
-p:parents,遞迴建立需要的父目錄
2。2。6。rmdir 刪除一個空目錄(無法刪除一個非空目錄)
例:
——————————————————-刪除非空目錄gyh————————————
[root@freeit ~]# rmdir /root/gyh/
rmdir: failed to remove ‘/root/gyh’: Directory not empty
————————————————————刪除空目錄aaa————————————————-
[root@freeit ~]# ls /root/gyh/
aaa
[root@freeit ~]# rmdir /root/gyh/aaa
[root@freeit ~]# ls /root/gyh/
3.檔案操作命令
2。3。1。df 報告檔案系統的總容量、使用量、剩餘量、掛載情況
————————————————————-檢視sda的使用情況————————————————
[root@freeit ~]# df /dev/sda
Filesystem 1K-blocks Used Available Use% Mounted on
- 315904 212 315692 1% /dev
2。3。2。find 在指定路徑查詢檔案
例1:查詢/目錄下user1使用者的所有檔案,並複製到/root/findfile中
[root@freeit ~]#find / -user user1 –exec /bin/cp –rf {} /root/findfile \;
引數說明:
-user:按檔案屬主查詢
-name:按檔名字查詢
-group:按檔案屬組查詢
-perm:按檔案許可權查詢
-atime –n:使用時間在N天以內
-atime +n:使用時間在N天以前
-mtime –n:內容改變時間在N天以內
-mtime +n:內容改變時間在N天以前
-ctime -n:檔案狀態改變時間在N天內
-ctime +n:檔案狀態改變時間在N天前
-size +1000000c –print :查詢檔案長度大於1M位元組的檔案
注:
Linux檔案無建立時間
Access為使用時間
Modify為內容修改時間
Change為狀態改變時間(許可權、屬主)
例2:查詢user1的所有檔案
[root@freeit ~]# find / -user user1
find: ‘/proc/9538/task/9538/fd/6’: No such file or directory
find: ‘/proc/9538/task/9538/fdinfo/6’: No such file or directory
find: ‘/proc/9538/fd/6’: No such file or directory
find: ‘/proc/9538/fdinfo/6’: No such file or directory
/tmp/user1
/var/spool/mail/user1
/home/user1
/home/user1/。mozilla
/home/user1/。mozilla/extensions
/home/user1/。mozilla/plugins
/home/user1/。bash_logout
/home/user1/。bash_profile
/home/user1/。bashrc
/home/user1/。cache
/home/user1/。cache/abrt
/home/user1/。cache/abrt/lastnotification
/home/user1/。config
/home/user1/。config/abrt
/home/user1/。bash_history
2。3。3。whereis&which
whereis:查詢一個命令相關資訊放在那裡(查詢命令的目錄);
which:檢視當前要執行的命令所在的路徑;
————————————————————-查詢ls命令的存放目錄——————————————————
[root@freeit ~]# whereis ls
ls:
/bin/ls
/usr/share/man/man1p/ls。1p。gz /usr/share/man/man1/ls。1。gz
————————————————————-檢視ls命令所在路徑——————————————————————-
[root@freeit ~]# which ls
alias ls=’ls ——color=auto‘
/usr/bin/ls
2。3。4。grep 指定檔案中查詢指定的字串
——————————————-過濾出/etc/passwd中user1使用者所在行——————————————
[root@freeit ~]# cat /etc/passwd |grep user1
user1:x:501:501::/home/user1:/bin/bash
2。3。5。cat 連續顯示、檢視檔案內容
通俗講就是:本命令以不可編輯文字方式顯示檔案的內容(而Vim是可以編輯的)
——————————————————檢視/etc/passwd檔案內容——————————————————
[root@freeit tmp]#
cat /etc/passwd
root:x:0:0:root:/root:/bin/bash
bin:x:1:1:bin:/bin:/sbin/nologin
daemon:x:2:2:daemon:/sbin:/sbin/nologin
adm:x:3:4:adm:/var/adm:/sbin/nologin
lp:x:4:7:lp:/var/spool/lpd:/sbin/nologin
sync:x:5:0:sync:/sbin:/bin/sync
shutdown:x:6:0:shutdown:/sbin:/sbin/shutdown
halt:x:7:0:halt:/sbin:/sbin/halt
mail:x:8:12:mail:/var/spool/mail:/sbin/nologin
uucp:x:10:14:uucp:/var/spool/uucp:/sbin/nologin
operator:x:11:0:operator:/root:/sbin/nologin
games:x:12:100:games:/usr/games:/sbin/nologin
gopher:x:13:30:gopher:/var/gopher:/sbin/nologin
ftp:x:14:50:FTP User:/var/ftp:/sbin/nologin
nobody:x:99:99:Nobody:/:/sbin/nologin
dbus:x:81:81:System message bus:/:/sbin/nologin
usbmuxd:x:113:113:usbmuxd user:/:/sbin/nologin
rpc:x:32:32:Rpcbind Daemon:/var/cache/rpcbind:/sbin/nologin
oprofile:x:16:16:Special user account to be used by OProfile:/home/oprofile:/sbin/nologin
vcsa:x:69:69:virtual console memory owner:/dev:/sbin/nologin
rtkit:x:499:496:RealtimeKit:/proc:/sbin/nologin
avahi-autoipd:x:170:170:Avahi IPv4LL Stack:/var/lib/avahi-autoipd:/sbin/nologin
abrt:x:173:173::/etc/abrt:/sbin/nologin
haldaemon:x:68:68:HAL daemon:/:/sbin/nologin
saslauth:x:498:76:“Saslauthd user”:/var/empty/saslauth:/sbin/nologin
postfix:x:89:89::/var/spool/postfix:/sbin/nologin
rpcuser:x:29:29:RPC Service User:/var/lib/nfs:/sbin/nologin
nfsnobody:x:65534:65534:Anonymous NFS User:/var/lib/nfs:/sbin/nologin
gdm:x:42:42::/var/lib/gdm:/sbin/nologin
ntp:x:38:38::/etc/ntp:/sbin/nologin
apache:x:48:48:Apache:/var/www:/sbin/nologin
mysql:x:27:27:MySQL Server:/var/lib/mysql:/bin/bash
pulse:x:497:494:PulseAudio System Daemon:/var/run/pulse:/sbin/nologin
xguest:x:500:500:Guest:/home/xguest:/bin/bash
sabayon:x:86:86:Sabayon user:/home/sabayon:/sbin/nologin
sshd:x:74:74:Privilege-separated SSH:/var/empty/sshd:/sbin/nologin
tcpdump:x:72:72::/:/sbin/nologin
named:x:25:25:Named:/var/named:/sbin/nologin
dhcpd:x:177:177:DHCP server:/:/sbin/nologin
user1:x:501:501::/home/user1:/bin/bash
user2:x:502:502::/home/user2:/bin/bash
2。3。6。more 分頁檢視檔案內容
由於無法以圖文演示本命令,請自行驗證。
注:Ctrl+b向上翻一頁
Ctrl+m向下翻一行
空格,向下翻一頁
2。3。7。less 分頁可控制檢視檔案內容
說明:當我們直接在真機上使用命令時,有時候檢視一個檔案或目錄內容(一頁顯示不完),系統預設全部顯示,但是不能像windows一樣上下滾動顯示。
我們可以利用less命令一頁一頁的顯示,但是也是不可逆的,不能往回看
例:檢視/etc/passwd內容
[root@freeit ~]# less /etc/passwd

按空格鍵向下翻頁。
2。3。8。cp 複製檔案或目錄
例:
——————————————————複製/etc/passwd到/tmp下————————————————————
[root@freeit tmp]# pwd
/tmp
[root@freeit tmp]# ls
[root@freeit tmp]# cp /etc/passwd 。
[root@freeit tmp]# ls
passwd
常用引數:
-p:帶許可權複製
2。3。9。mv 移動檔案或目錄
此命令的使用與windows中的剪下命令功能一樣。但是在Linux中,移動的同時,也可以改名。
————————————————————-把/root下的gyh檔案移動到/tmp————————————
[root@freeit tmp]# ls /root/
1 anaconda-ks。cfg
gyh
……
[root@freeit tmp]#
mv /root/gyh /tmp/
[root@freeit tmp]# ls
gyh passwd
————————————————————把/tmp下的gyh改名為gyh。bak——————————————
[root@freeit tmp]#
mv gyh gyh.bak
[root@freeit tmp]# ls
gyh。bak passwd
[root@freeit tmp]#
2。3。10。rm 刪除檔案或非空目錄
——————————————————————刪除/tmp檔案下的passwd——————————————
[root@freeit tmp]# pwd
/tmp
[root@freeit tmp]# ls
gyh。bak passwd
[root@freeit tmp]#
rm passwd
rm: remove regular file ‘passwd’? y
[root@freeit tmp]# ls
gyh。bak
//刪除成功
常用引數:
-r:刪除目錄
-f:強制刪除,不提示直接刪除
2。3。11。touch 建立空檔案
——————————————————-在/tmp目錄下建立一個空檔案gyh——————————————————-
[root@freeit tmp]# pwd
/tmp
[root@freeit tmp]# touch gyh
[root@freeit tmp]# ls
gyh
2。3。12。head 顯示檔案頭幾行
例:檢視/etc/passwd檔案的前10行內容,對照上面cat顯示的內容驗證
[root@freeit tmp]# head /etc/passwd |nl
1 root:x:0:0:root:/root:/bin/bash
2 bin:x:1:1:bin:/bin:/sbin/nologin
3 daemon:x:2:2:daemon:/sbin:/sbin/nologin
4 adm:x:3:4:adm:/var/adm:/sbin/nologin
5 lp:x:4:7:lp:/var/spool/lpd:/sbin/nologin
6 sync:x:5:0:sync:/sbin:/bin/sync
7 shutdown:x:6:0:shutdown:/sbin:/sbin/shutdown
8 halt:x:7:0:halt:/sbin:/sbin/halt
9 mail:x:8:12:mail:/var/spool/mail:/sbin/nologin
10 uucp:x:10:14:uucp:/var/spool/uucp:/sbin/nologin
注:
nl為顯示行號
2。3。13。tail 顯示檔案尾幾行
例:檢視/etc/passwd檔案的後10行內容,參照cat顯示內容
[root@freeit tmp]# tail /etc/passwd |nl
1 mysql:x:27:27:MySQL Server:/var/lib/mysql:/bin/bash
2 pulse:x:497:494:PulseAudio System Daemon:/var/run/pulse:/sbin/nologin
3 xguest:x:500:500:Guest:/home/xguest:/bin/bash
4 sabayon:x:86:86:Sabayon user:/home/sabayon:/sbin/nologin
5 sshd:x:74:74:Privilege-separated SSH:/var/empty/sshd:/sbin/nologin
6 tcpdump:x:72:72::/:/sbin/nologin
7 named:x:25:25:Named:/var/named:/sbin/nologin
8 dhcpd:x:177:177:DHCP server:/:/sbin/nologin
9 user1:x:501:501::/home/user1:/bin/bash
10 user2:x:502:502::/home/user2:/bin/bash
4.ln連結
2。4。1。軟連結
軟連結也叫做符號連結,相當於windows中的快捷方式。做完連結之後,連結檔案的大小不變,不管原始檔怎麼變化。
——————————————————————-/mnt目錄下建立gyh。text檔案——————————————————
[root@freeit tmp]# touch /mnt/gyh。text
[root@freeit tmp]# ll /mnt/
total 0
-rw-r——r——。 1 root root 0 Apr 28 19:11 gyh。text
//大小為0
——————————————————————把此檔案連線到/tmp下並檢視大小——————————————-
[root@freeit tmp]# ln -s /mnt/gyh。text 。/gyh
[root@freeit tmp]# ll
total 0
lrwxrwxrwx。 1 root root
13
Apr 28 19:25 gyh -> /mnt/gyh。text
連結之後大小為13K
——————————————————————向原始檔中匯入內容————————————————————————-
[root@freeit tmp]# cat /etc/inittab >/mnt/gyh。text
[root@freeit tmp]# ll /mnt/gyh。text
-rw-r——r——。 1 root root
491
Apr 28 19:31 /mnt/gyh。text
//大小變為491
——————————————————————-檢視連線檔案/tmp/gyh的大小——————————————————
[root@freeit tmp]# ll
total 0
lrwxrwxrwx。 1 root root
13
Apr 28 19:25 gyh -> /mnt/gyh。text
//連結檔案的大小沒有變
注:
軟連線相當於windows中的快捷方式,原始檔刪除之後,連結即失效。
2。4。2。硬連結
硬連結主要用於同步備份使用,原始檔的大小變化,也會同步到連結檔案。
————————————————-/mnt目錄下建立gyh。text檔案——————————————————————————
[root@freeit tmp]# touch /mnt/gyh。text
[root@freeit tmp]# ls /mnt/
gyh.text
————————————————-把此檔案硬連結到/tmp下————————————————————————————-
[root@freeit tmp]# ln -n /mnt/gyh。text /tmp/gyh
[root@freeit tmp]# ll
total 0
-rw-r——r——。 2 root root
0
May 3 19:33 gyh
//大小為0
————————————————————-向原始檔gyh。text匯入內容——————————————————————
[root@freeit tmp]# cat /etc/passwd >/mnt/gyh。text
[root@freeit tmp]# ll /mnt
total 4
-rw-r——r——。 2 root root
1926
May 3 19:36 gyh。text
//原始檔匯入內容後大小發生變化:1926
————————————————————————檢視連結檔案的大小————————————————————————
[root@freeit tmp]# ll
total 4
-rw-r——r——。 2 root root
1926
May 3 19:36 gyh
//大小與原始檔一樣,同步增長
————————————————————————-刪除原始檔,驗證連線檔案是否還能用——————————
[root@freeit tmp]# rm -rf /mnt/gyh。text
[root@freeit tmp]#
cat gyh
root:x:0:0:root:/root:/bin/bash
bin:x:1:1:bin:/bin:/sbin/nologin
daemon:x:2:2:daemon:/sbin:/sbin/nologin
adm:x:3:4:adm:/var/adm:/sbin/nologin
lp:x:4:7:lp:/var/spool/lpd:/sbin/nologin
sync:x:5:0:sync:/sbin:/bin/sync
shutdown:x:6:0:shutdown:/sbin:/sbin/shutdown
halt:x:7:0:halt:/sbin:/sbin/halt
mail:x:8:12:mail:/var/spool/mail:/sbin/nologin
operator:x:11:0:operator:/root:/sbin/nologin
games:x:12:100:games:/usr/games:/sbin/nologin
ftp:x:14:50:FTP User:/var/ftp:/sbin/nologin
nobody:x:99:99:Nobody:/:/sbin/nologin
dbus:x:81:81:System message bus:/:/sbin/nologin
polkitd:x:999:998:User for polkitd:/:/sbin/nologin
unbound:x:998:997:Unbound DNS resolver:/etc/unbound:/sbin/nologin
colord:x:997:996:User for colord:/var/lib/colord:/sbin/nologin
usbmuxd:x:113:113:usbmuxd user:/:/sbin/nologin
avahi:x:70:70:Avahi mDNS/DNS-SD Stack:/var/run/avahi-daemon:/sbin/nologin
avahi-autoipd:x:170:170:Avahi IPv4LL Stack:/var/lib/avahi-autoipd:/sbin/nologin
saslauth:x:996:76:“Saslauthd user”:/run/saslauthd:/sbin/nologin
qemu:x:107:107:qemu user:/:/sbin/nologin
libstoragemgmt:x:995:994:daemon account for libstoragemgmt:/var/run/lsm:/sbin/nologin
rpc:x:32:32:Rpcbind Daemon:/var/lib/rpcbind:/sbin/nologin
rpcuser:x:29:29:RPC Service User:/var/lib/nfs:/sbin/nologin
nfsnobody:x:65534:65534:Anonymous NFS User:/var/lib/nfs:/sbin/nologin
rtkit:x:172:172:RealtimeKit:/proc:/sbin/nologin
radvd:x:75:75:radvd user:/:/sbin/nologin
ntp:x:38:38::/etc/ntp:/sbin/nologin
chrony:x:994:993::/var/lib/chrony:/sbin/nologin
abrt:x:173:173::/etc/abrt:/sbin/nologin
pulse:x:171:171:PulseAudio System Daemon:/var/run/pulse:/sbin/nologin
gdm:x:42:42::/var/lib/gdm:/sbin/nologin
gnome-initial-setup:x:993:991::/run/gnome-initial-setup/:/sbin/nologin
postfix:x:89:89::/var/spool/postfix:/sbin/nologin
sshd:x:74:74:Privilege-separated SSH:/var/empty/sshd:/sbin/nologin
tcpdump:x:72:72::/:/sbin/nologin
freeit_gyh:x:1000:1000:freeit_gyh:/home/freeit_gyh:/bin/bash
//原始檔刪除之後,連結檔案仍然可用,由此可以看出,硬連結的檔案也能起到備份的作用
5.許可權操作
2。5。1。檔案許可權介紹
格式:(-rw-r——r——)

2。5。2。檔案屬性介紹
[root@freeit ~]# ls -l /etc/passwd
-rw-r——r——。 1 root root 1926 Dec 11 22:59 /etc/passwd
-rw-r——r——:許可權
。:引用計數
root:所有者
root:所屬組
1926:檔案大小,單位K
Dec 11 22:59:建立時間
/etc/passwd:檔名字
2。5。3。許可權操作命令
chmod命令:根據檔案訪問許可權的字母以及對應的數值用來設定訪問許可權的數值。
chmod [OPTION]。。。 MODE[,MODE]。。。 FILE。。。
使用數值改變檔案許可權:
#chmod 777 file1
使用字母來改變檔案的許可權:
引數設定
a 所有使用者
u 建立者
g 同組使用者
o 其他使用者,除去建立者和同組使用者之外的使用者
+ 增加許可權
- 清除許可權
= 設定唯一許可權
常用設定
g+w —— 增加組使用者的寫許可權
o-rwx —— 清除其他使用者的全部訪問許可權
u+x —— 允許檔案屬主執行檔案
a+rw —— 允許所有使用者讀和寫檔案
ug+r —— 允許檔案屬主和屬組使用者讀檔案
g=rx —— 設定屬組使用者只能讀和執行檔案(不可寫)
透過增加 -R 引數(遞迴),可以改變整個目錄樹的許可權。
#chmod o+w sneakers。txt
#chmod go-rw sneakers。txt
#chmod a-rw sneakers。txt
例:建立一個檔案/tmp/onepice。txt,修改許可權,所有者rwx,所屬組和其他使用者rw許可權
[root@freeit tmp]# chmod u=rwx onepice。txt
[root@freeit tmp]# ll
total 0
-rwxr——r-x。 1 root root 0 May 6 08:29 onepice。txt
[root@freeit tmp]# chmod g+rw onepice。txt
[root@freeit tmp]# ll
total 0
-rwxrw-r-x。 1 root root 0 May 6 08:29 onepice。txt
[root@freeit tmp]# chmod o+rw onepice。txt
[root@freeit tmp]# ll
total 0
-rwxrw-rwx。 1 root root 0 May 6 08:29 onepice。txt
注:許可權的附加,可以使用“+”,也可以使用“=”。
2。5。4。ACL許可權
命令:
getfacl:檢視檔案的acl許可權。
setfacl:設定檔案的acl許可權。
簡介:
使用chmod命令,可以為檔案設定許可權,設定物件有宿主、所屬組、其他使用者。但是,chmod設定的許可權是大方向的,並不能針對具體的使用者進行許可權的設定,所以引入了acl許可權。具體使用看下面的例子
例:依然拿上面的onepice。txt檔案為例,檢視其acl許可權,然後針對具體使用者設定:user1使用者只有讀(r)的許可權,user2使用者有讀寫(rw)的許可權。
[root@freeit tmp]# pwd
/tmp
[root@freeit tmp]# ls
onepice。txt
[root@freeit tmp]# getfacl onepice。txt
# file: onepice。txt //檔名
# owner: root //檔案所有者
# group: root //檔案所屬組
user::rwx //檔案所有者的許可權
group::rw- //檔案所屬組的許可權
other::rwx //其他使用者對檔案的許可權
——————————————————————-針對user1、user2設定acl——————————————————————-
[root@freeit tmp]# setfacl -m u:user1:r—— onepice。txt
//對user1設定acl許可權
[root@freeit tmp]# setfacl -m u:user2:rw- onepice。txt
//對user2設定acl許可權
[root@freeit tmp]# getfacl onepice。txt
# file: onepice。txt
# owner: root
# group: root
user::rwx
user:user1:r-- //user1只有讀的許可權
user:user2:rw- //user2只有rw許可權
group::rw-
mask::rw-
other::rwx
——————————————————————-驗證——————————————————————————————-
[root@freeit tmp]# su user1
[user1@freeit tmp]$ cat onepice。txt
[user1@freeit tmp]$
//user1可以檢視,由於檔案為空,所以檢視內容為空
[user1@freeit tmp]$ head /etc/passwd >onepice。txt
bash: onepice。txt: Permission denied
//寫入內容被拒絕,無許可權
[root@freeit tmp]# su user2
[user2@freeit tmp]$ head /etc/passwd >onepice。txt
[user2@freeit tmp]$ cat onepice。txt
root:x:0:0:root:/root:/bin/bash
bin:x:1:1:bin:/bin:/sbin/nologin
daemon:x:2:2:daemon:/sbin:/sbin/nologin
adm:x:3:4:adm:/var/adm:/sbin/nologin
lp:x:4:7:lp:/var/spool/lpd:/sbin/nologin
sync:x:5:0:sync:/sbin:/bin/sync
shutdown:x:6:0:shutdown:/sbin:/sbin/shutdown
halt:x:7:0:halt:/sbin:/sbin/halt
mail:x:8:12:mail:/var/spool/mail:/sbin/nologin
operator:x:11:0:operator:/root:/sbin/nologin
//user2可以寫入內容,並且能夠檢視,有讀寫的許可權