對於sentinel的前置知識這裡就不多說了:
直接上程式碼:
Release v1。8。1 · alibaba/Sentinel · GitHub 下載地址
springcloud Alibaba環境下建立soringboot的專案:
POM:
server: port: 8089spring: application: name: cloudorder cloud: nacos: discovery: server-addr: 127。0。0。1:8848 sentinel: # eager: true transport: port: 8719 dashboard: localhost:8080management: endpoints: web: exposure: include: “*”feign: sentinel: enabled: true
主啟動
import org。springframework。boot。SpringApplication;import org。springframework。boot。autoconfigure。SpringBootApplication;import org。springframework。cloud。client。discovery。EnableDiscoveryClient;import org。springframework。cloud。client。loadbalancer。LoadBalanced;import org。springframework。cloud。openfeign。EnableFeignClients;import org。springframework。context。annotation。Bean;import org。springframework。web。client。RestTemplate;@SpringBootApplication@EnableDiscoveryClient@EnableFeignClientspublic class OrderApplication8088 { public static void main(String[] args) { SpringApplication。run(OrderApplication8088。class,args); } @Bean @LoadBalanced public RestTemplate getRestTemplate(){ return new RestTemplate(); }}
寫一個controller介面就可以了:
@RequestMapping(“/order”)public String test1(@RequestParam(name = “id”)String id){ return UUID。randomUUID()。toString()+ “ id :”+ id;}
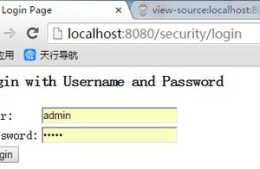
先啟動nacos註冊中心,再啟動sentinel的檢測服務,本次用的是1。8。1的版本:java -jar sentinel-dashboard-1。8。1。jar 就可以啟動服務了再啟動我們的springboot服務訪問 localhost:8080就是sentinel的服務介面了 可以在上面配置服務的限流和降級的配置,以及熱點key的配置
@RequestMapping(“/getFeign”) @SentinelResource(value = “getFeign”,blockHandler = “demotionGetFeign”,fallback = “deGetFeign”) public String getFeign(@RequestParam(name = “id”,required = false,defaultValue = “5”)String id) {// int i = 10/0; return “eeee eee ”+proFeign。provide(id); }
public String demotionGetFeign(String id, BlockException ex){ return id+“ 服務降級了啊。。。o(╥﹏╥)o”+ex;}public String deGetFeign(String id){ return “限流了啊。。。。o(╥﹏╥)o”;}
@SentinelResource(value = “getFeign”,blockHandler = “demotionGetFeign”,fallback = “deGetFeign”)
說一下這個註解就是配置接口出現異常 或者限流後應該怎麼處理:
blockHandler 這個屬性是在sentinel控制檯配置的規則出現問題的時候會作出相應的處理方案
fallback 這個是兜底的方法了 程式碼出現異常 或者其他問題就會走這個方法了需要注意的是
blockHandler 的降級方法的返回值和引數要和原來的方法一樣,同時要加上
BlockException ex屬性,代表出現異常後的資訊至於sentinel介面的配置就不多說了 可以看看官網寫的sentinel的持久化配置:
步驟:
新增pom
配置yml
spring: application: name: sentinel-service cloud: nacos: discovery: #nacos服務註冊中心地址 server-addr: www。cjlly。com:8848 sentinel: transport: dashboard: 127。0。0。1:8080 port: 8719 datasource: ds1: nacos: server-addr: www。cjlly。com:8848 dataId: sentinel-service groupId: DEFAULT_GROUP data-type: json rule_type: flow
登陸nacos,新建配置規則sentinel-service
[{“resource”: “/findById”,“limitApp”:“default”,“grade”:1,“count”:1,“strategy”:0,“controlBehavior”:0,“clusterMode”:false}]
naocs配置解讀:
resource:資源名稱
limitApp:來源應用
grade:閥值型別,0——-執行緒數,1——-QPS
count:單機閥值
strategy:流控模式,0——-直接,1——-關聯,2——-鏈路
controlBehavior:流控效果,0——-快速失敗,1——-warmUp,2——-排隊等待
clusterMode:是否叢集
需要注意地方:
此時如果是Nacos叢集,每個節點務必要配置到同一個資料庫上。並且保證每個
節點都可用。如果有的節點宕掉了可能會導致配置持久化失敗。
部署在nacos上的配置檔案的名字並沒有太多要求,只需要跟微服務專案中yml檔案中配置的dataId一致即可。


